Leads tracking enables medspas to monitor and manage interactions with potential patients, gain insights into the conversion funnel, and prioritize the most promising leads. With the proper interactions and touchpoints, a medspa can easily grow its customer base. BoomerangFX offers lead generation as well as one-on-one consulting to help your medspa grow to its highest potential.
1. Go to BoomerangFX
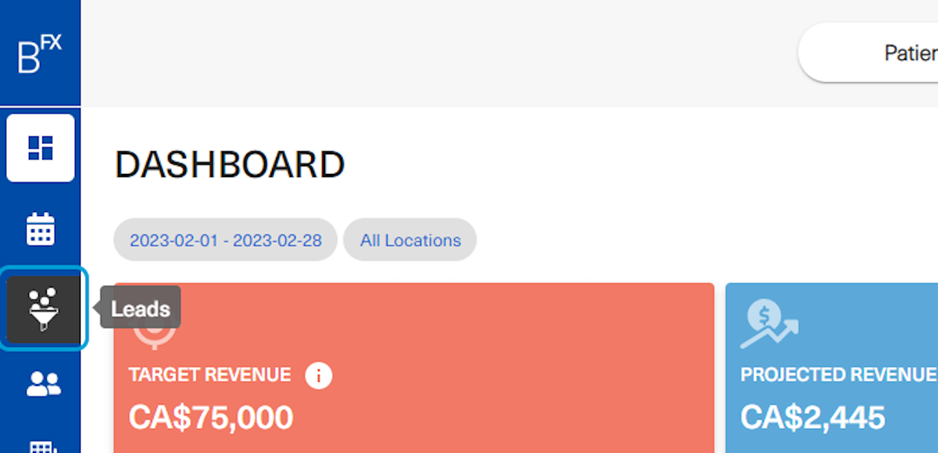
2. To access the Leads dashboard, click on Leads on the left bar menu
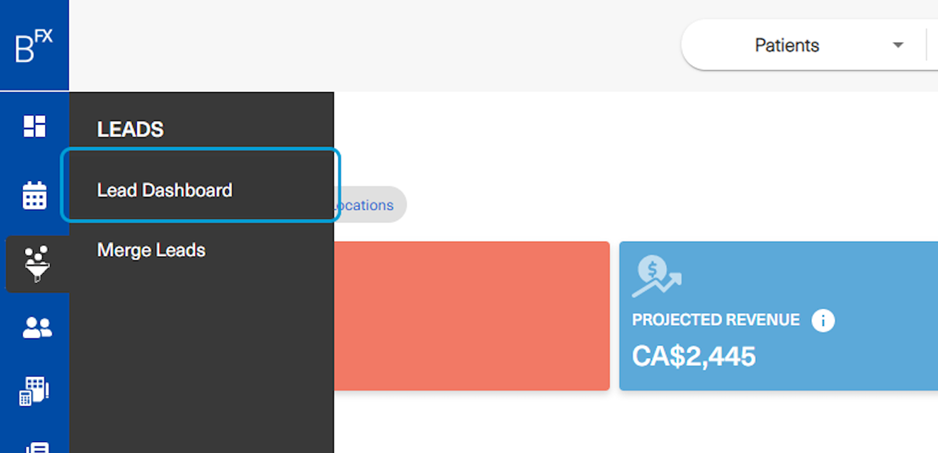
3. Click on Lead Dashboard
4. This is how the leads dashboard will look like
The Conversion Rates funnel will provide insights on each stage of the cycle. The leads dashboard refreshes automatically to keep you up to date with the leads coming in. Using this approach will enable you to respond to leads quickly, ensuring a faster turnaround time and improving the likelihood of converting them into consults, and ultimately, recurring patients.
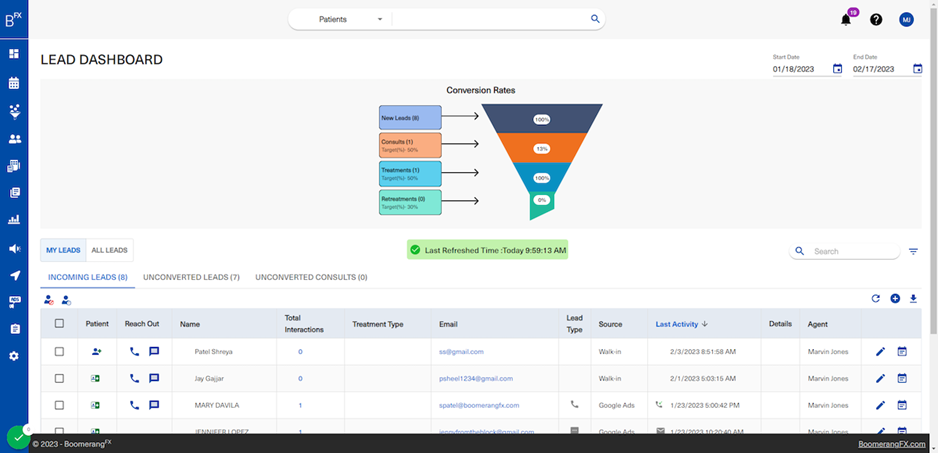
5. Scroll down to find the list of leads sorted by latest activity
New leads will be highlighted in green.
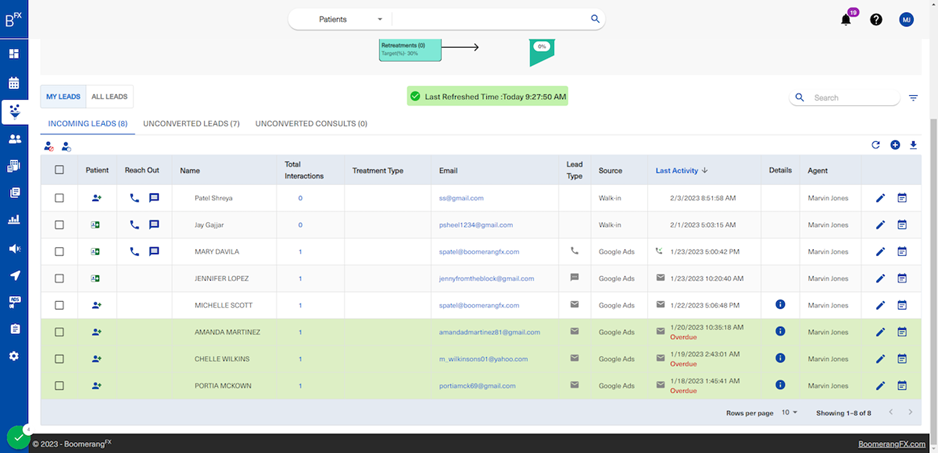
6. The list can be filtered by the leads assigned to the current user or All Leads
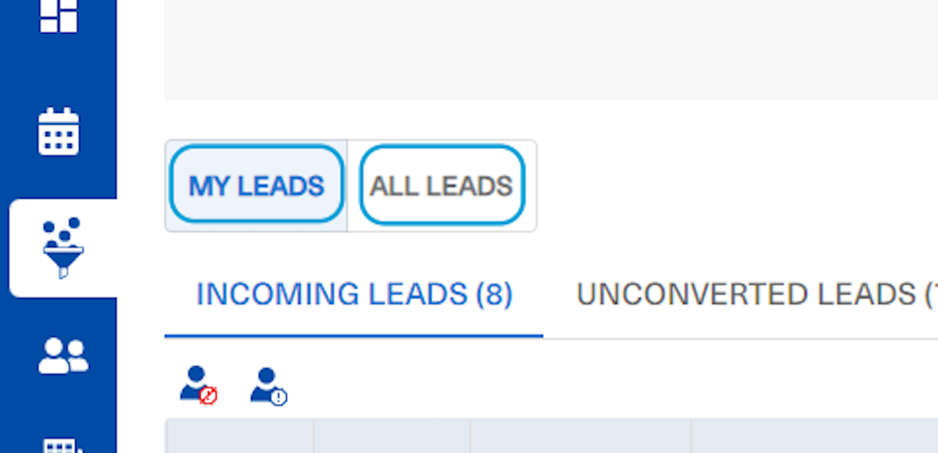
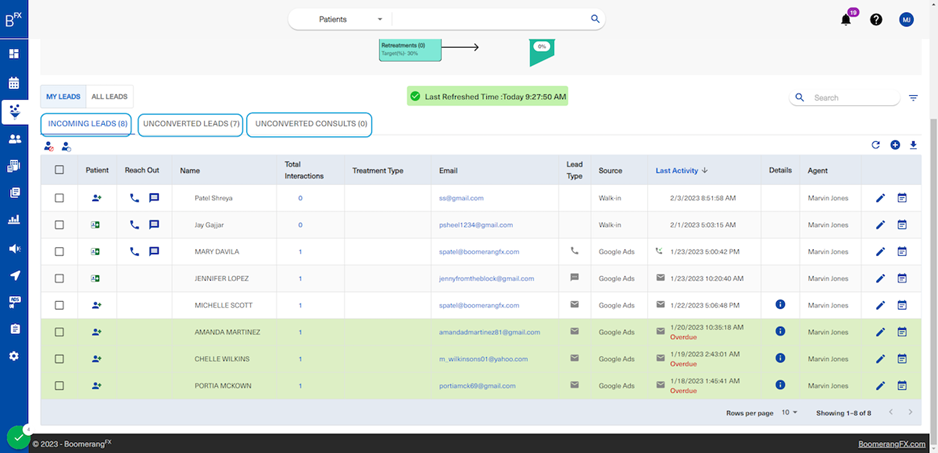
7. Under each page (My Leads and All Leads), there are 3 tabs to filter between the following lead stages: - All incoming leads - Unconverted leads only - Unconverted consults to treatments
These tabs are provided to help staff members more easily recognize the leads that need more attention. This also decreases the margin of error in the conversion process allowing the reports in the manager's dashboard to produce more accurate results in finding out whether the staff needs additional training in converting leads or not rather than having not followed up with the lead.
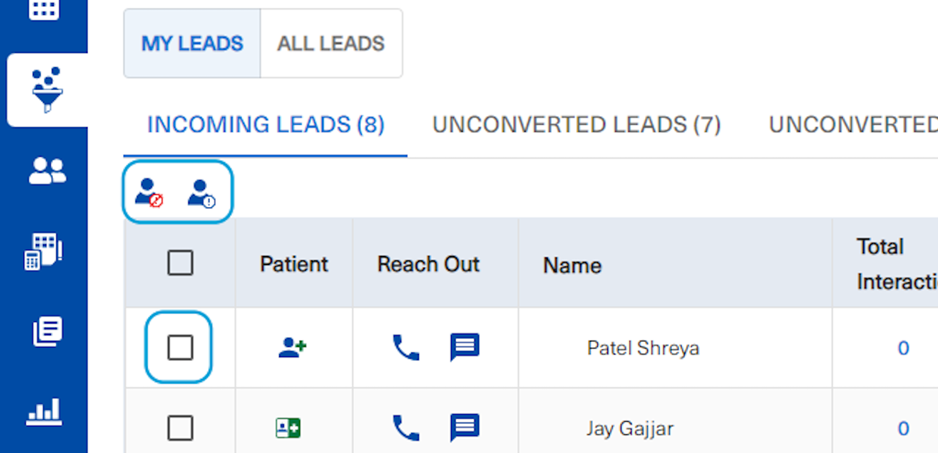
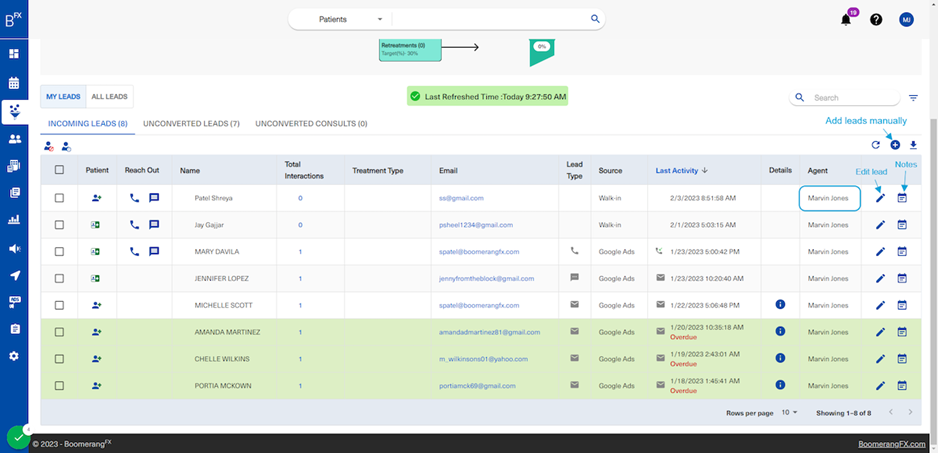
8. Starting with the "My Leads" page, the person icons with a red label and a green label identify whether a lead is spam or not and the checkbox under that is used to select the lead(s)
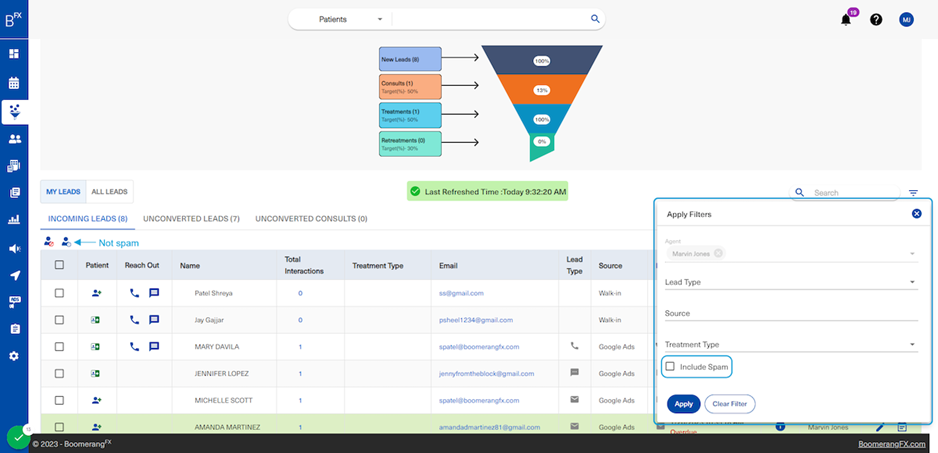
Once a lead is labeled as spam, this lead's row will be hidden from the list, but can also be viewed when filtered to appear (skip to step 21 to see how). Labeling leads as spam helps in sifting through leads that are unlikely to be converted to consults. This helps the staff focus more on the qualified leads.
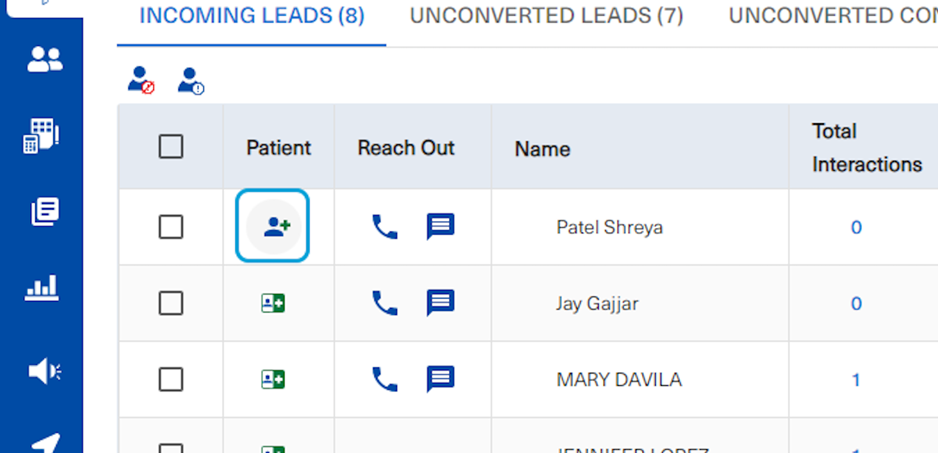
9. The person icon with a plus under the Patient column can be selected by the user to create a new appointment for this lead directly through the leads dashboard and add him/her as a new patient as well
This also allows the user to create a new patient through the appointment creation pop-up.
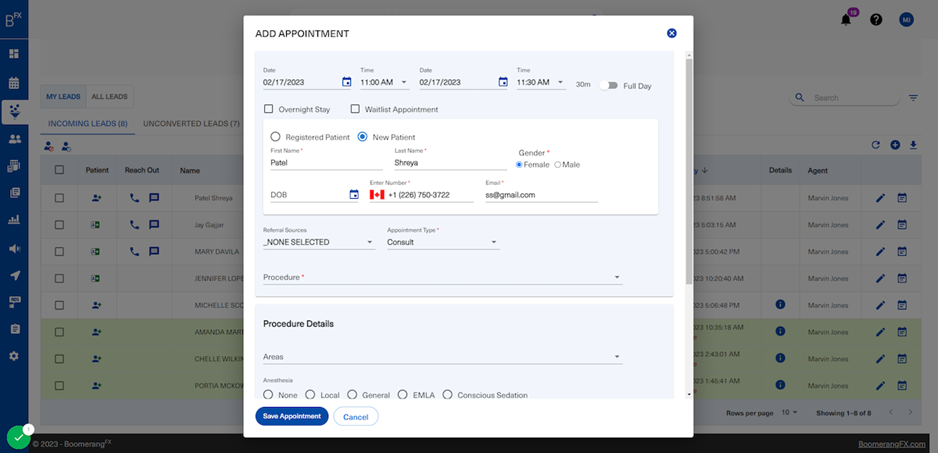
10. Once selected, this pop-up will appear with the lead's details already populated into the new patient's details and the default Appointment Type will be a consult
Referral Sources need to be specified by the staff member to reflect more accurate reporting through the Manager's Dashboard. Once the appointment is saved, it will appear on the scheduler under the patient's profile that was just created. The patient will also receive emails and texts regarding their appointment and Communication Consent.
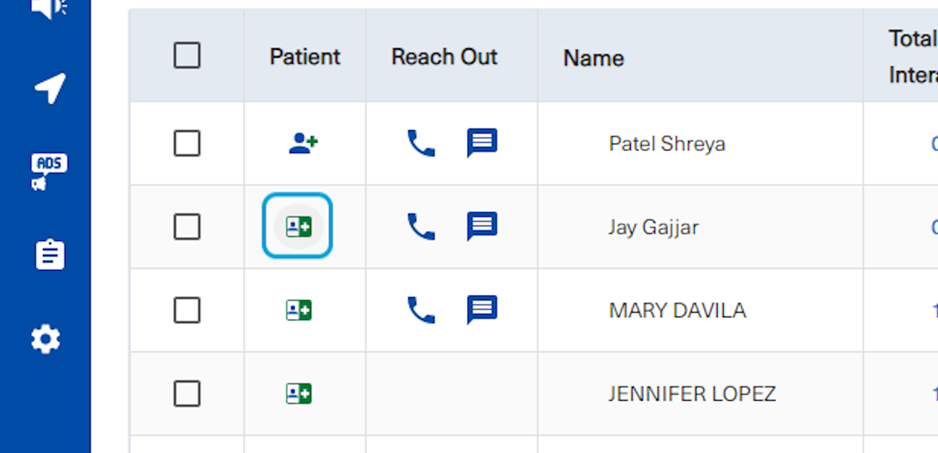
11. This icon under the Patient column indicates that this lead already has a patient profile
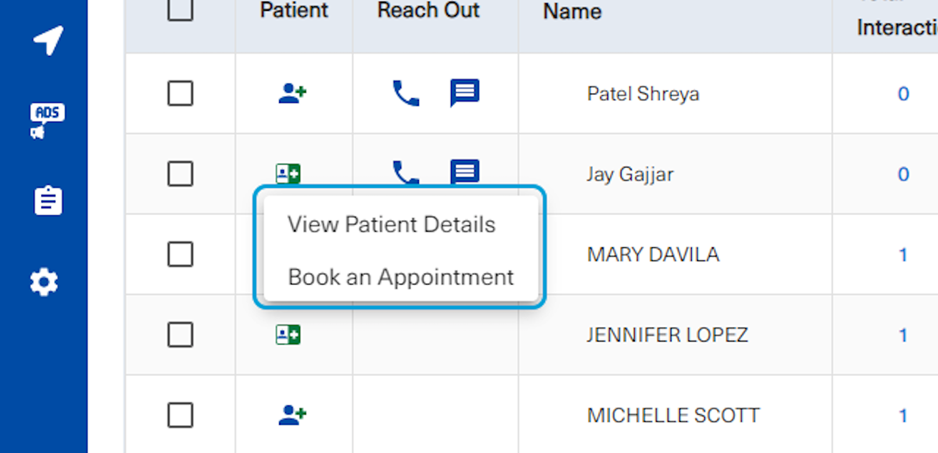
12. Once selected by the user, the two options shown below appear
The user may click on View Patient Details to redirect to the patient profile or click on Book an Appointment. The same pop-up will appear, and this patient's existing profile will be selected in the appointment.
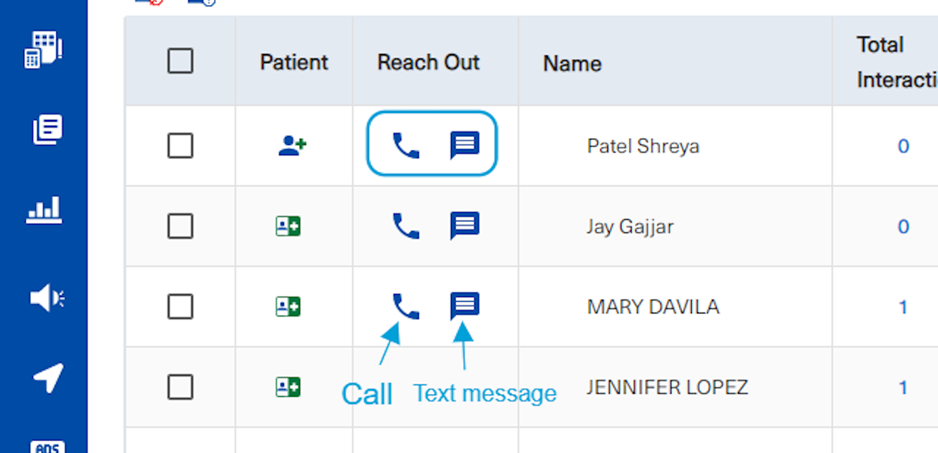
13. Under the Reach Out column, the two icons are meant for direct interaction with the lead
• The phone icon allows users to call the lead directly
• The message icon allows users to sent a text message directly to the lead
This is all done directly through the user login.
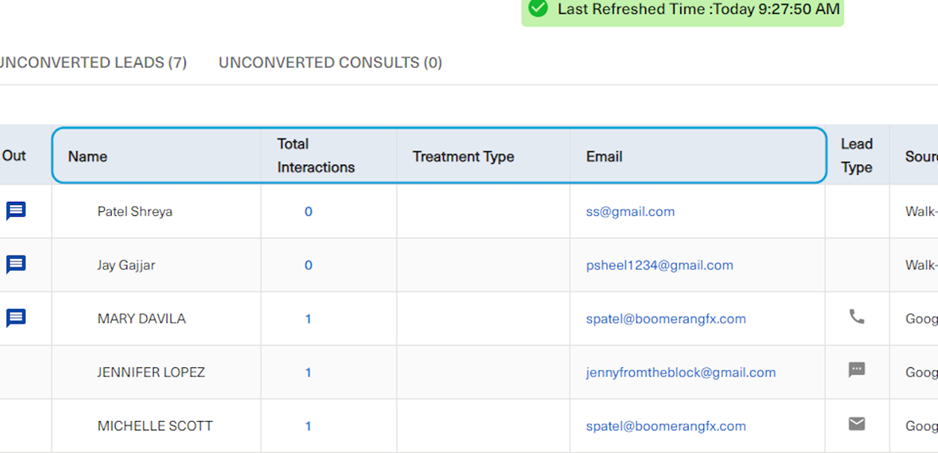
14. The columns shown below are
• The phone icon allows users to call the lead directly
• The message icon allows users to sent a text message directly to the lead
This is all done directly through the user login.
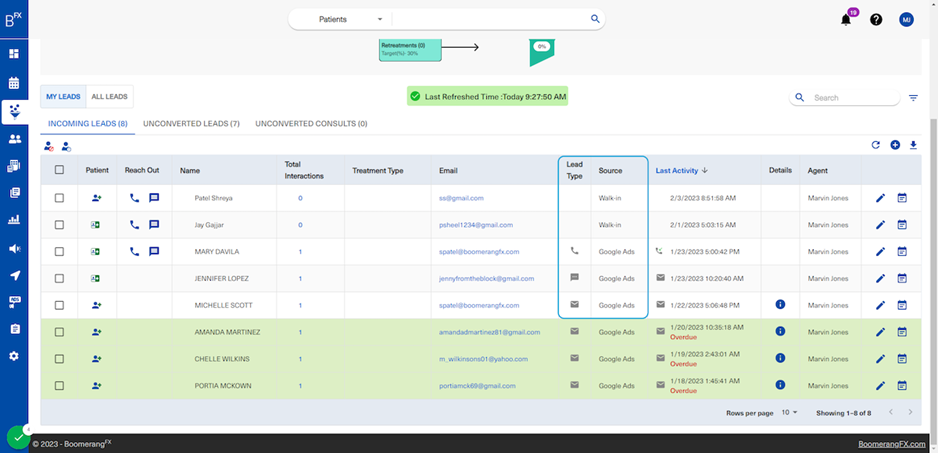
15. Lead Type indicates the means of contact that this lead used and the source indicates where this lead came from
Walk-in leads do not have a lead type because they have not utilized any means of external communication
• The phone icon indicates a phone call
• The message icon indicates a direct message
• The mail icon indicates it was an online form
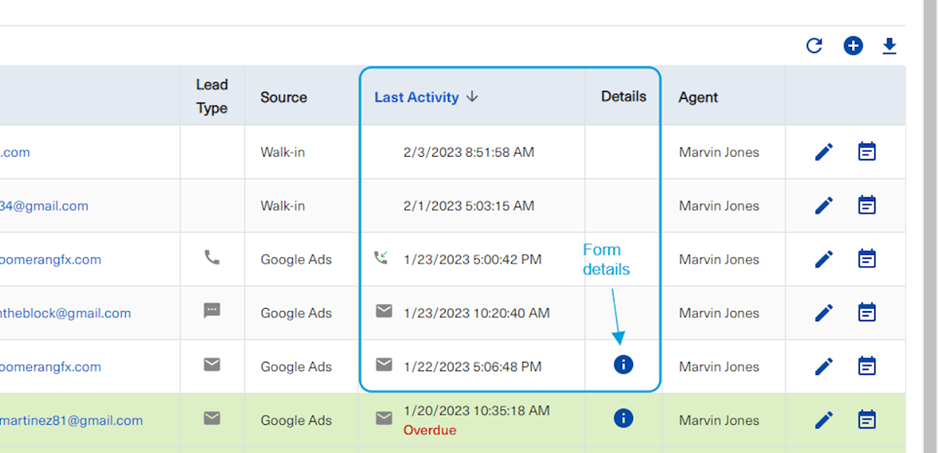
16. The Last Activity column sorts all leads from latest to oldest and the Details column allows users to hover over (or tap on) the "i" icon (information icon) to view the form submission details
The form details will present the online form questions and their answers.
17. The Agent column contains the name of the staff member assigned to that lead. To add a new lead manually, click on the plus icon. To Edit a lead, click on the pencil icon. Finally, to add any notes about the lead, click on the notepad icon.
All icons are labeled below.
Skip to step 19 to see how to assign an agent to a lead under All Leads.
18. The All Leads page displays every single lead that flows into the leads dashboard
This list includes leads that may or may not be assigned to staff members. In this list, users are able to assign leads to other users/staff members.
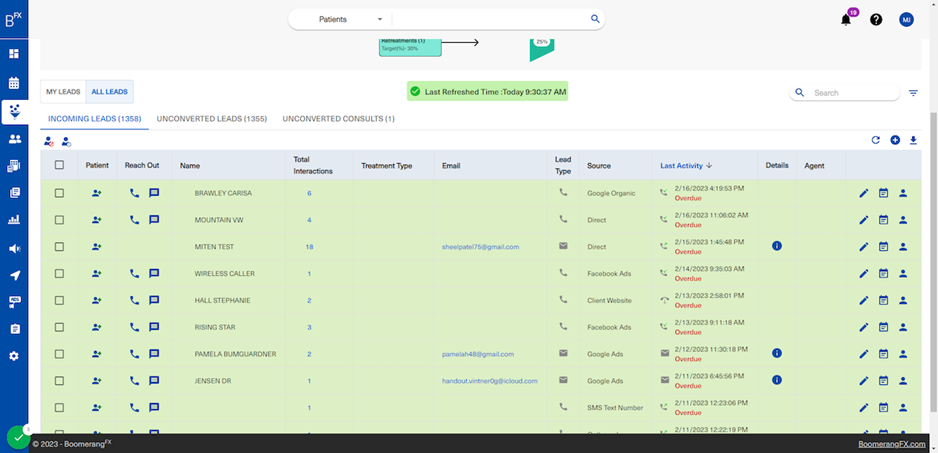
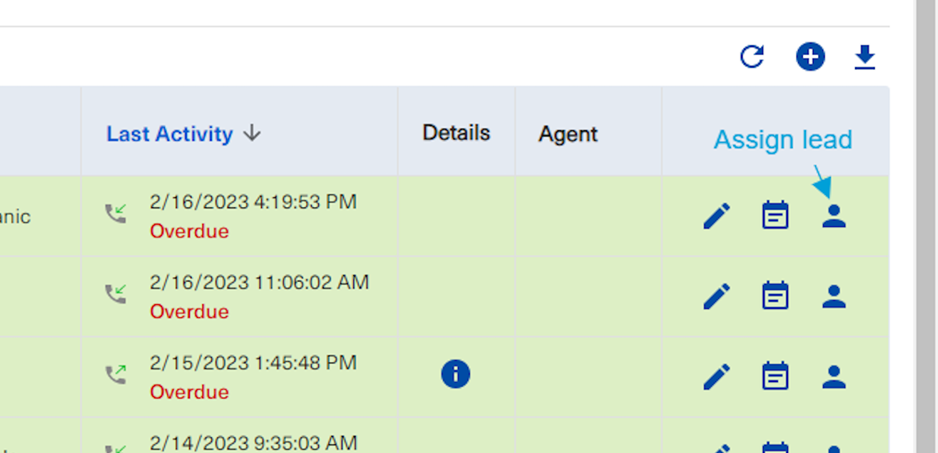
19. To assign a lead to an agent, click on the person icon on the right
All other buttons and columns reflect the same information mentioned earlier in the My Leads page
20. This filter icon shown below is found on the right side of the page above the list of leads
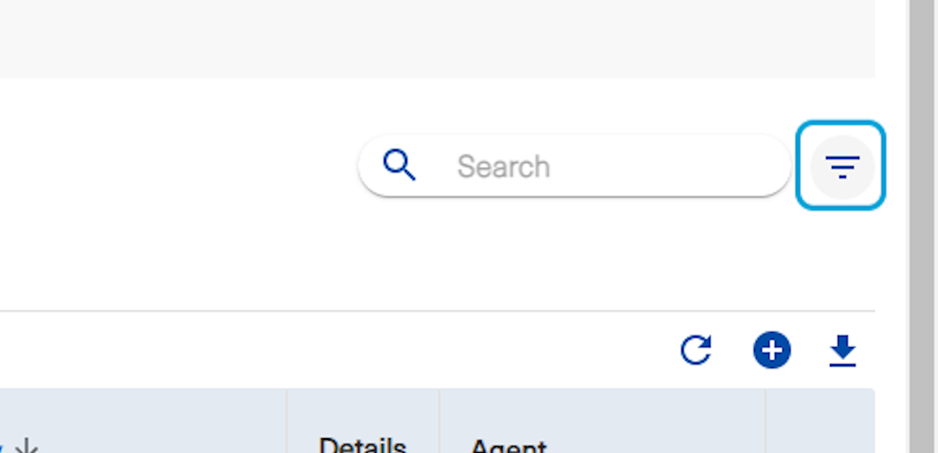
21. Once clicked, the user will be able to apply filters to narrow down the list based on preference
Users are able include spam leads in the list by clicking on the "Include Spam" checkbox shown below. By viewing spam leads, users are able to review and reassess whether the lead should stay a spam lead or should be reverted to a normal lead. To revert a lead from spam to not spam, the user will include spam in the list, click on the checkbox pertaining to the spam lead, and click on the not spam icon found on the top left of the list (person icon with a green exclamation mark).
