How to access Quotes?
The Create Quote page can be accessed in two ways:
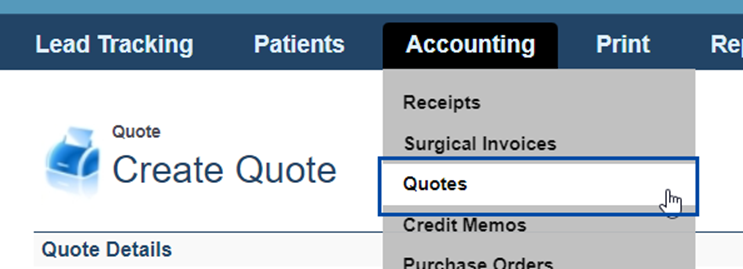
1)Via Menu
Quotes can be found in the Accounting Menu.
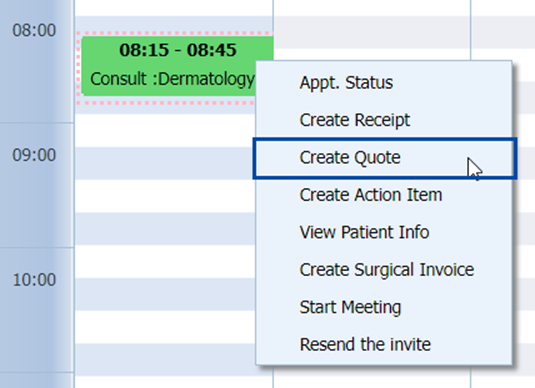
2)Via Scheduling
From the Schedule window, Right-Click to open a pop-up menu, and select Create Quote.
How to create a quote?
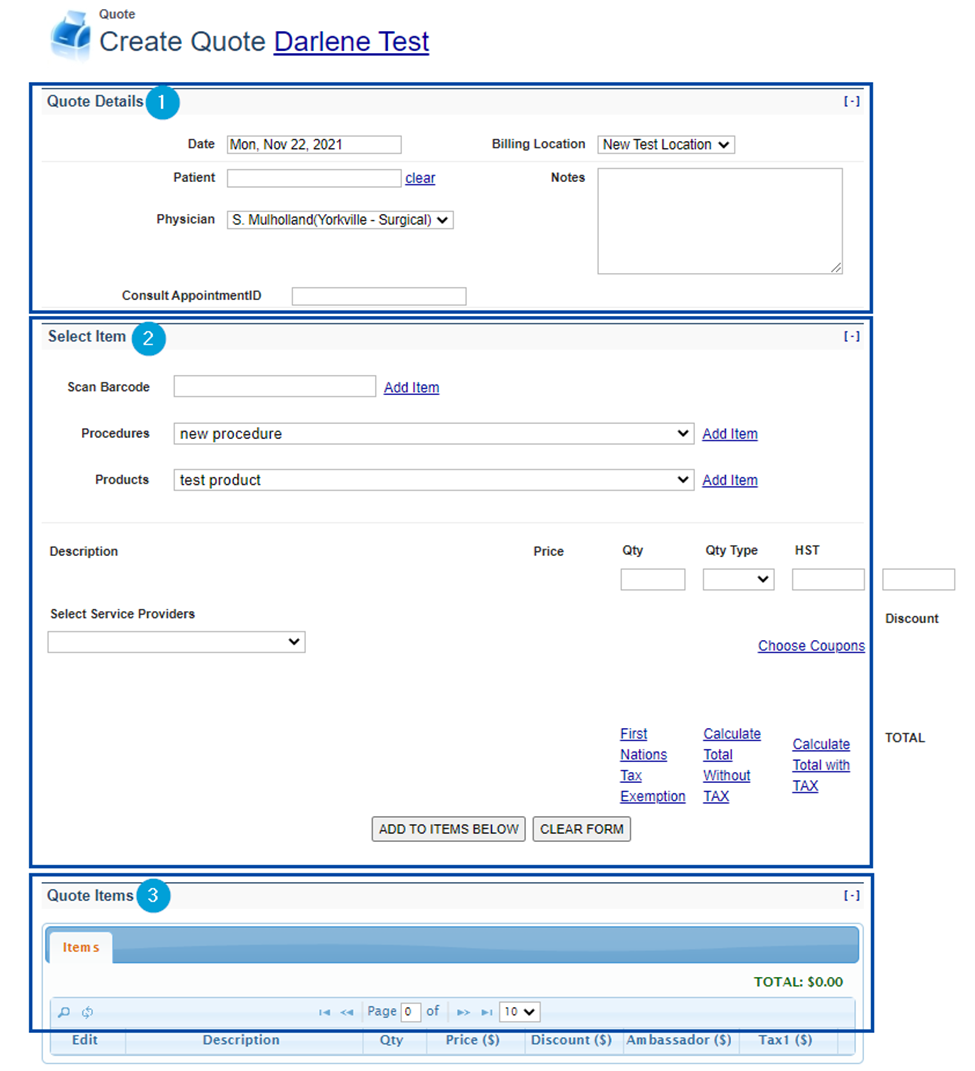
The Create Quote screen has three distinct sections: Quote Details (1), Select Items (2) and Quote Items (3).
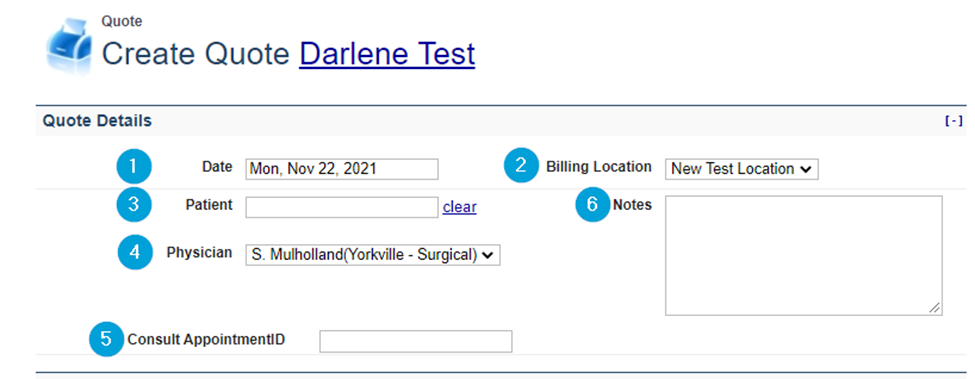
Quote Details
In this section, the pertinent patient/physician details are entered. User will enter in the following:
- Date (required) – Enter the date the quote was generated.
- Billing Location (required) – Use the drop-down menu to select the location.
- Patient (required) – Use the search box to locate the Patient. Once selected, the Patient will appear beside Create Quote as seen in the image below.
- Physician (required) - Use the drop-down menu to select the physician
- Consult Appointment ID – Add the Appointment ID if available.
- Notes – Add any additional notes if necessary.
Select Item
In this section, the user will select the relevant Barcodes, Procedures and Products to add to the Quote. These items are added to the Quote one at a time.
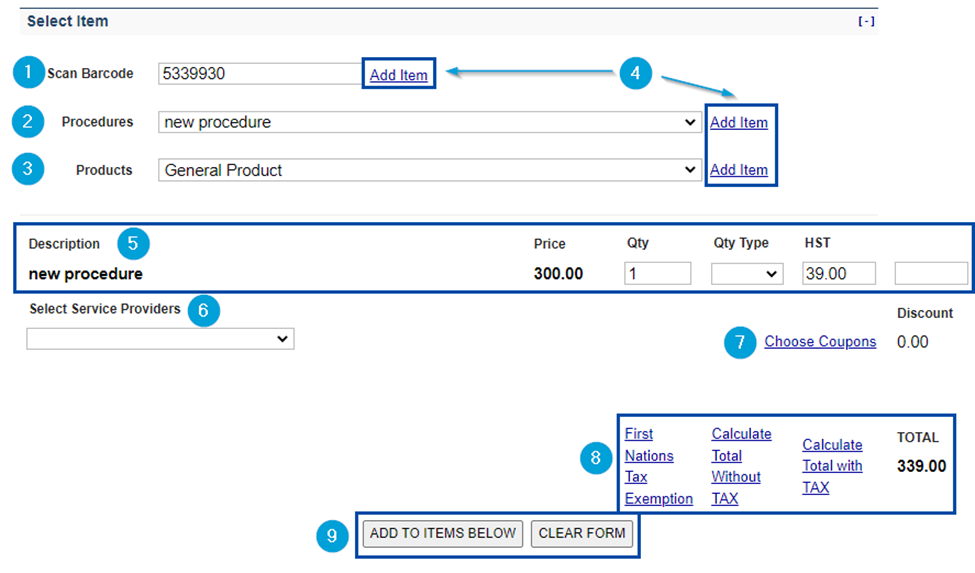
Scan Barcode
To add an item using a Barcode, scan or enter the Barcode (1), and click Add Item (4).
Procedures
To add a Procedure, select an item from the drop-down list beside Procedures (2), and click Add Item (4).
Products
To add a Product, select an item from the drop-down list beside Products (3), and click Add Item (4).
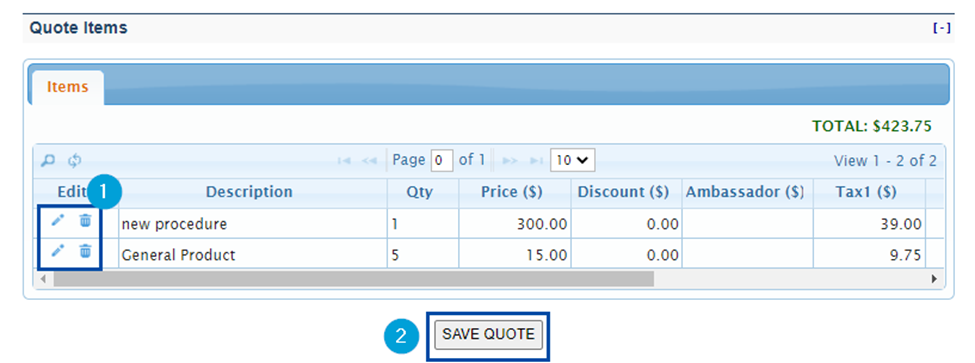
Quote Items
Once added, items will appear in the Quote Items list.
Users then have the option to Edit or Delete an item (1).
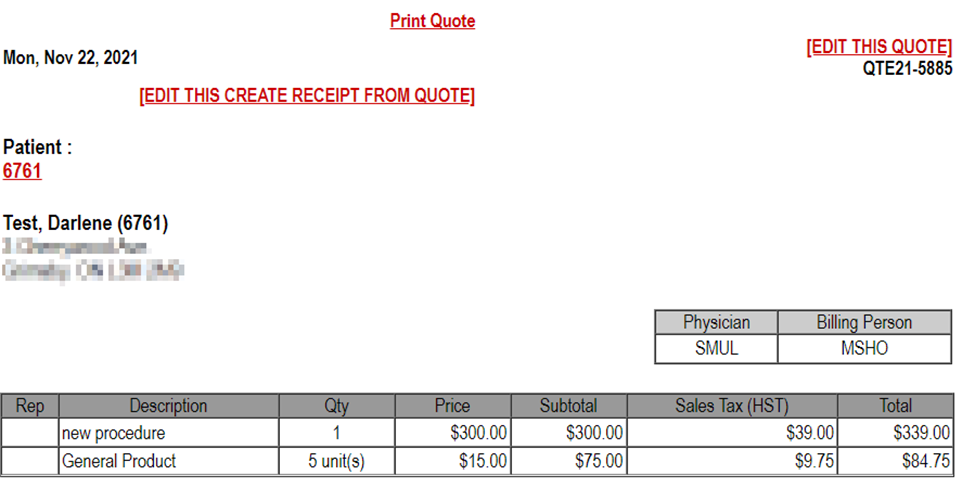
To create the final Quote, click Save Quote (2). The Quote will be displayed for printing.