How do I create a Receipt?
To create a Receipt, select Receipts under Accounting in the Top Menu Bar.

The Create Receipt screen has three distinct sections: Receipt Details, Select Item and Receipt Item.

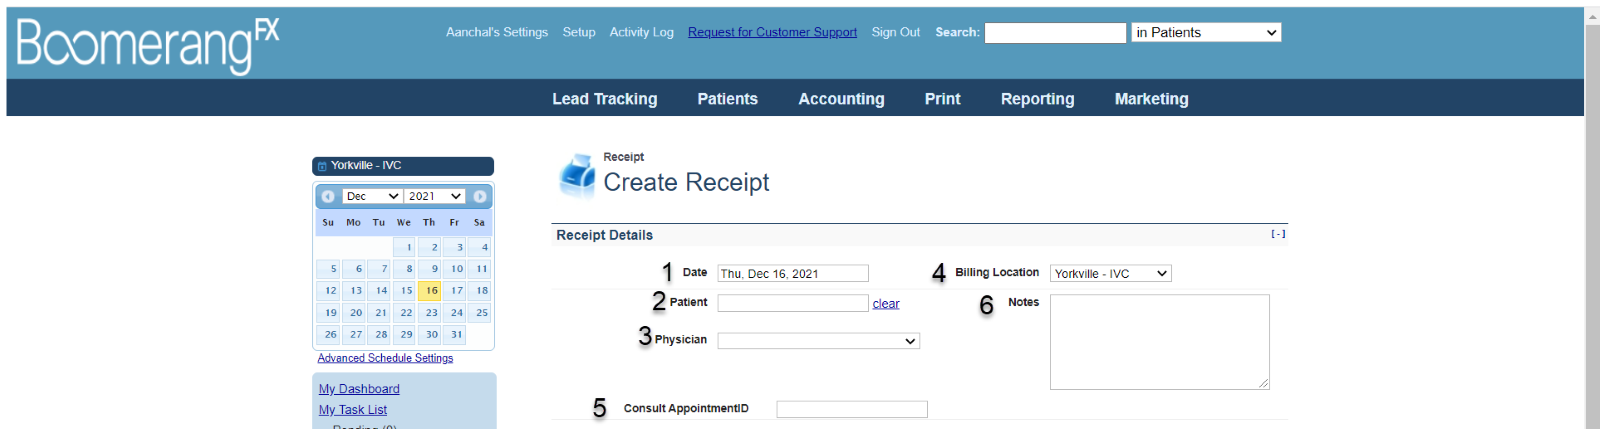
Receipt Details
In this section, the pertinent patient/physician details are entered. User will enter in the following:
1.Date (required)2.Patient (required)
3.Physician (required)
4.Billing Location (required)
5.Consult Appointment ID
6.Notes
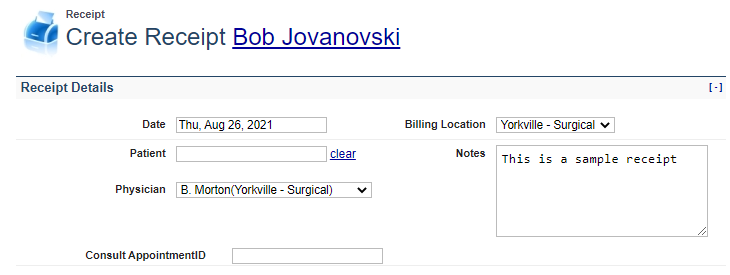
Once the information is entered, the Receipt Details will look like:
Select Item
In this section, the user will select the relevant Barcodes, Procedures and Products to add to the Receipt. These items can be added to the receipt one at a time.

Barcode
To add an item using a Barcode, scan or enter the Barcode (1), and click Add Item (2).
Procedure
To add an item using a Procedure, select an item from the drop-down list beside Procedures (3), and click Add Item (4).
Product
To add an item using a Product, select an item from the drop-down list beside Products (5), and click Add Item (6).
Once the item is added, it will then appear in Description (7), along with the default Price (8) and Quantity (9). All three values can be changed as needed.
Optional values include Quantity Type (10), Select Service Providers (11), Auto-Replenish Preference (12) and Choose Coupons (13).
The user must then select a tax type from the options provided (14) to get the final total.
After verifying the Item and Totals, the user must click (15) to either Add To Items Below, which adds the item to Credit Memo Items or Clear Form, which resets the selection form.
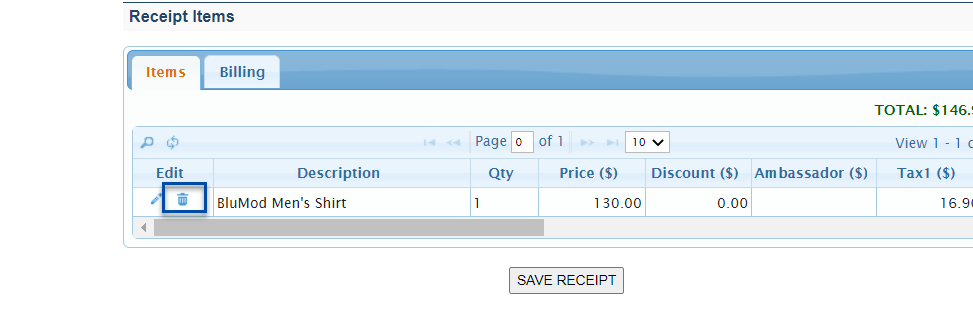
Receipt Items
Once added, items will appear in the Receipt Items list. To remove an item, click the corresponding Delete icon. To create the final Invoice, click Save Receipt. The Receipt will be displayed for printing.

How do I View a Receipt?
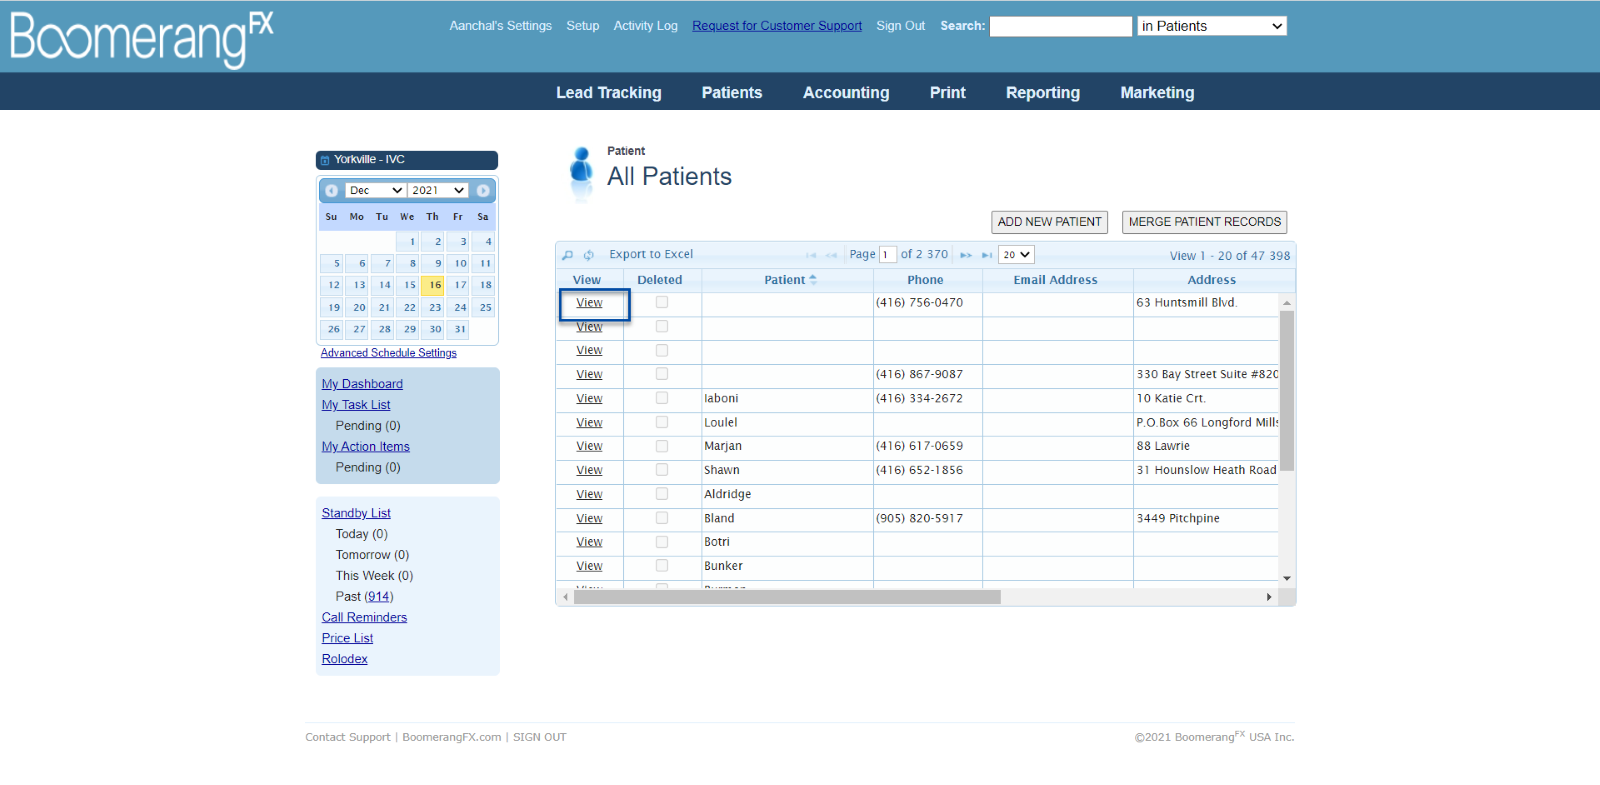
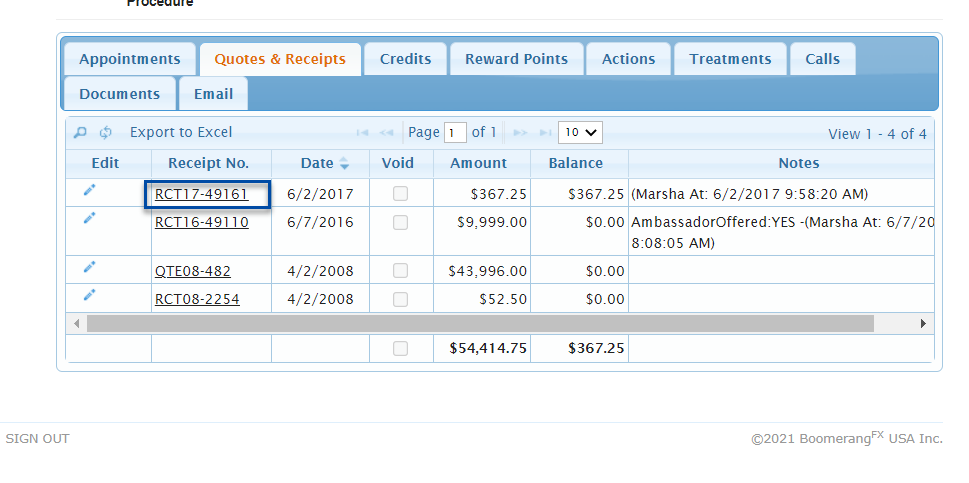
Once created, Receipts can be viewed in the patient’s information. To view the memo, select Patient List under Patients in the Top Menu Bar.

Then find and select the Patient in the Patient List to view Patient Details.
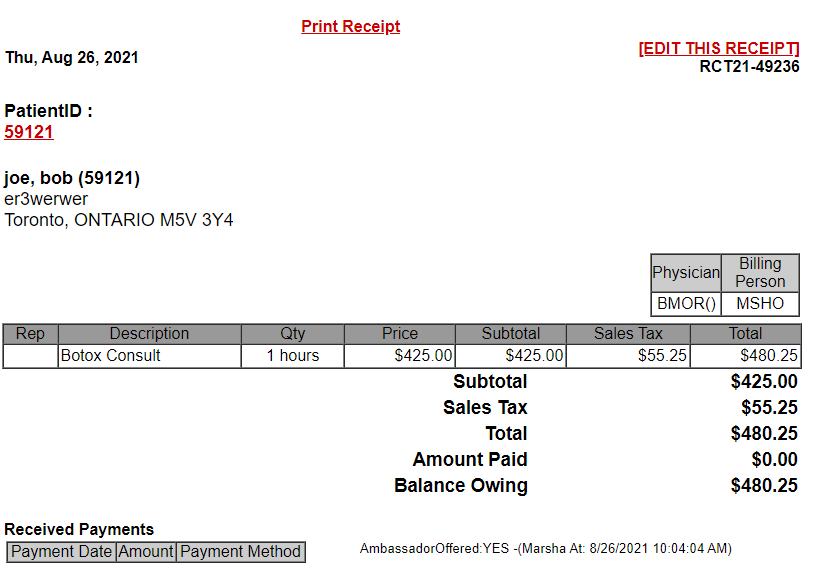
At the bottom of the screen, click the Quotes & Receipts tab to view all Receipts. Click on the Receipt Number to view the Receipt in full.
How do I Edit or Delete a Receipt?
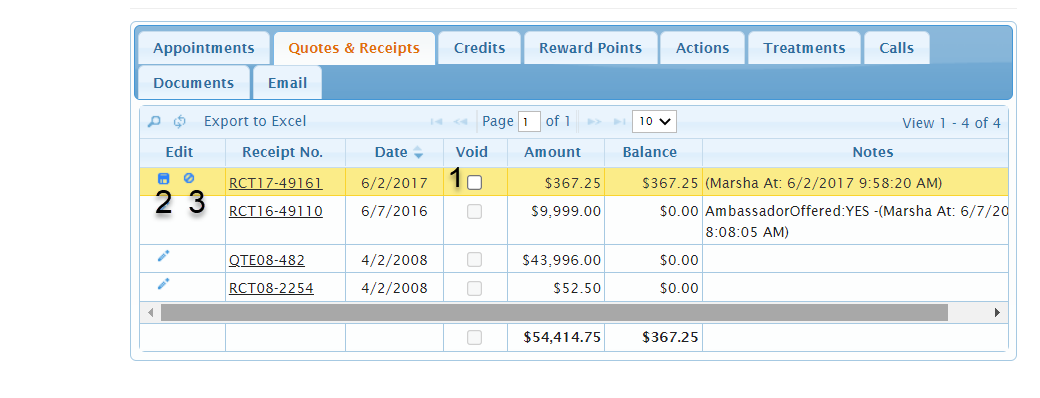
Once created, a Receipt cannot be edited nor deleted. However, a Receipt can be voided.
To Void a Receipt, click on the Edit icon for the corresponding Receipt.

In the Edit view, check the Void box (1). To confirm this change, click the Save icon (2). To cancel this change, click the Cancel icon (3).
Watch quick video tutorial here