1. From the dashboard, click on Scheduler from the left bar menu
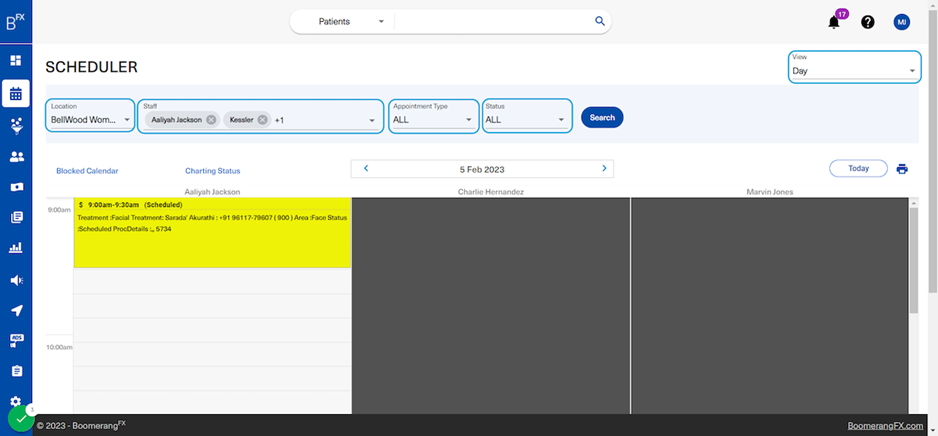
2. The user may decide to filter the schedule according to preference
• Location: if the clinic has multiple locations, the user may choose from any
• Staff: the user is capable of viewing 1 or more staff members' schedules
• Appointment Type: the user may choose to filter by appointment type (consult, follow-up, treatment, etc.)
• Status: the user may also filter according to appointment status (Confirmed, Arrived, Complete, etc.)
• View: the user is free to choose between the day view, week view, and month view
3. The Blocked Calendar button allows users to block out specific hours in a staff member's schedule

4. This is the Blocked Calendar menu
Specifying a reason to block out time is mandatory

5. The Charting Status button allows users to view patients' charts
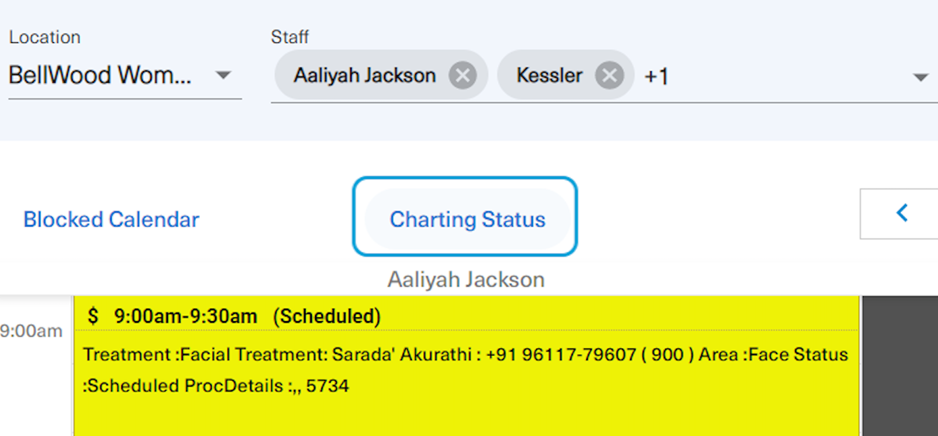
6. This is the Charting Status menu
To go back to the schedule, the user will click on Scheduler at the top left

7. In this workflow, staff members will be filtered to one person: Aaliyah Jackson

8. To trigger filtering options, the user will need to click on Search

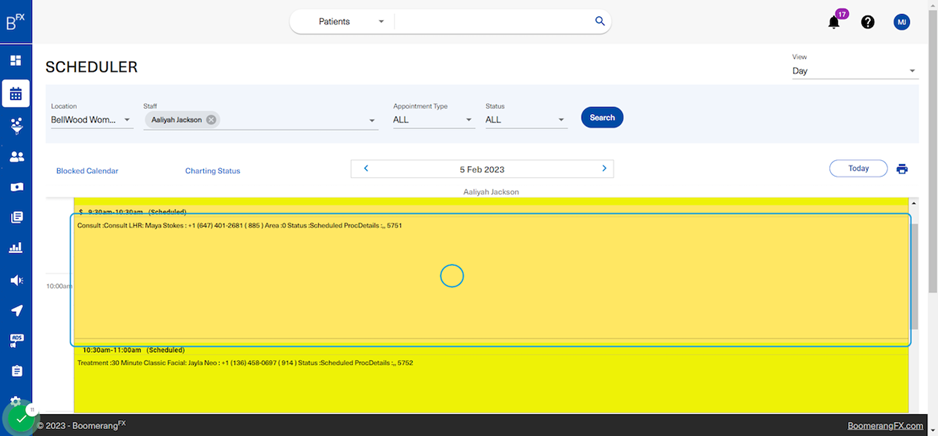
9. Booking an Appointment
To book an appointment, double-click on the empty space in the scheduler. The blue circle in the image below represents the double-click

10. A pop-up will appear prompting the user to enter appointment details
The date and time intervals are automatically entered. They are populated based on where the user double-clicks in the scheduler. The user is free to edit the time according to preference.
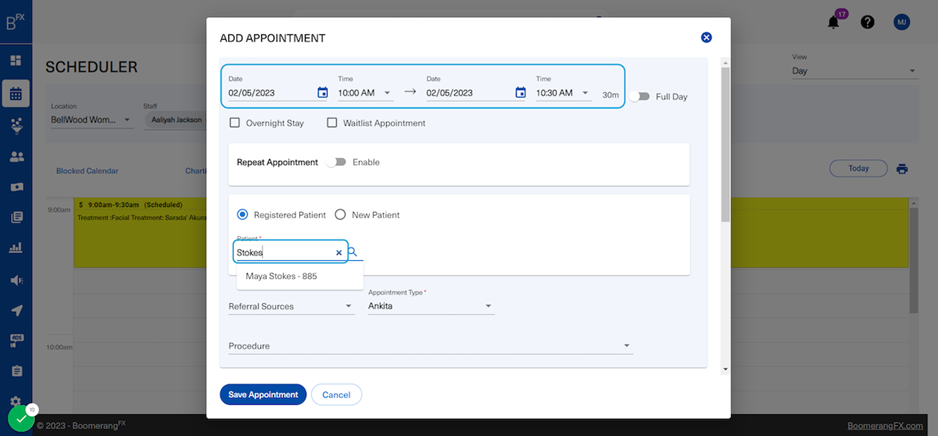
11. Patient Name
The user may choose to create the appointment for an existing registered patient in your BoomerangFX login, or to create a new patient directly on the current appointment booking pop-up.
Both examples will be covered in this workflow.
In the first example, a registered patient is chosen.

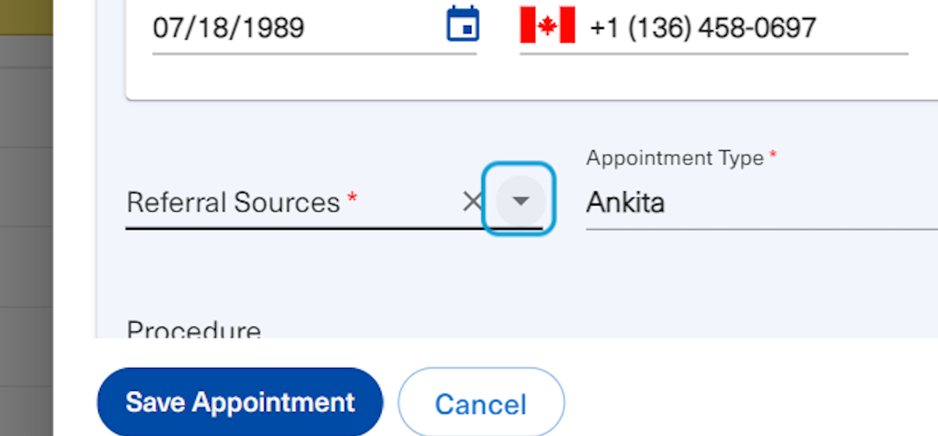
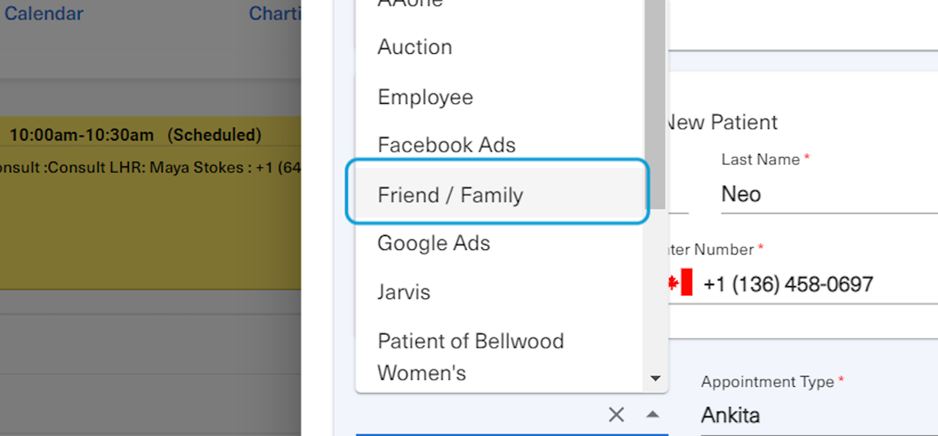
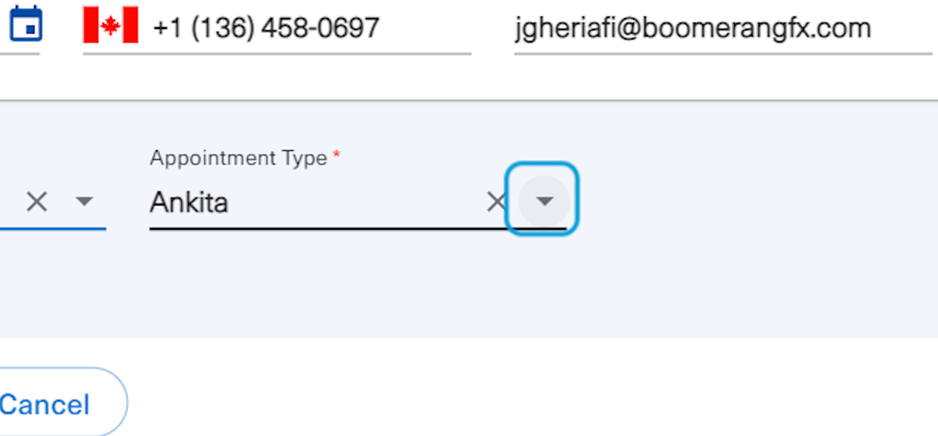
12. Referral Source and Appointment Type
These are mandatory fields, the user will choose from the lists provided.
Appointment types and referral sources can be edited under the Setup menu

13. Procedure
This field is also required
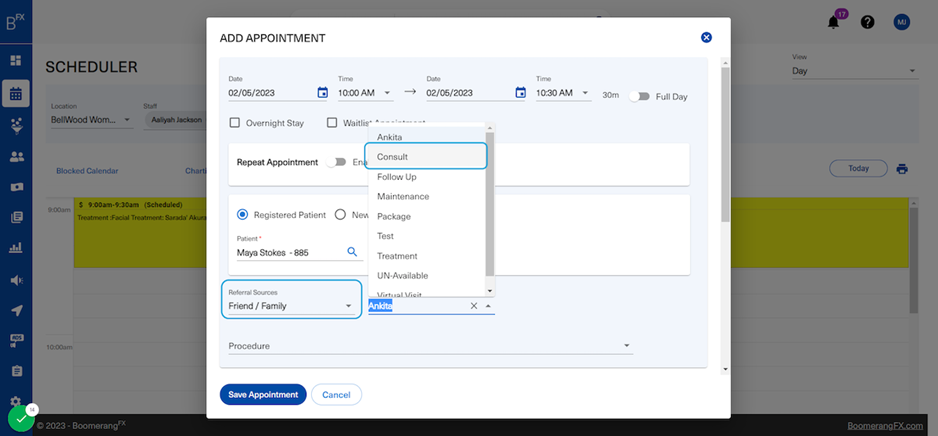
14. Users are to choose a procedure from the list of procedures in your BoomerangFX login
The list of procedures can also be edited under Setup.
The list that appears in this dropdown changes according to the Appointment Type that was chosen.

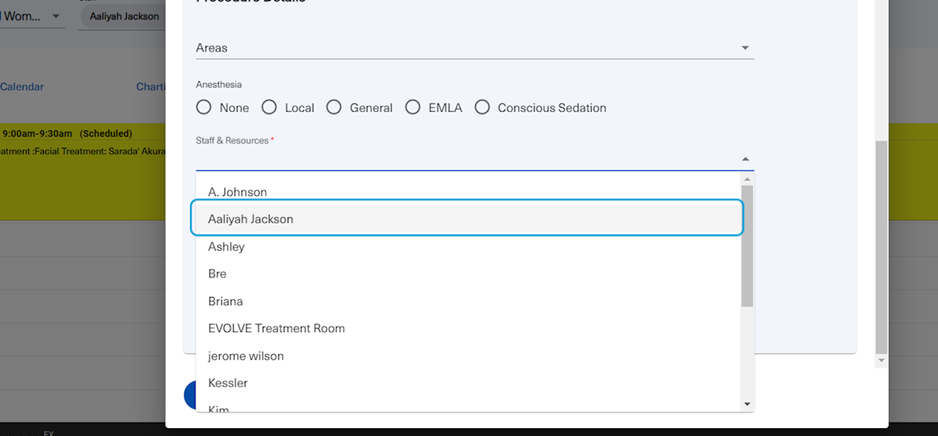
15. Finally, the user will choose the staff members who will carry out the appointment
It is possible for multiple staff members to be chosen at once.
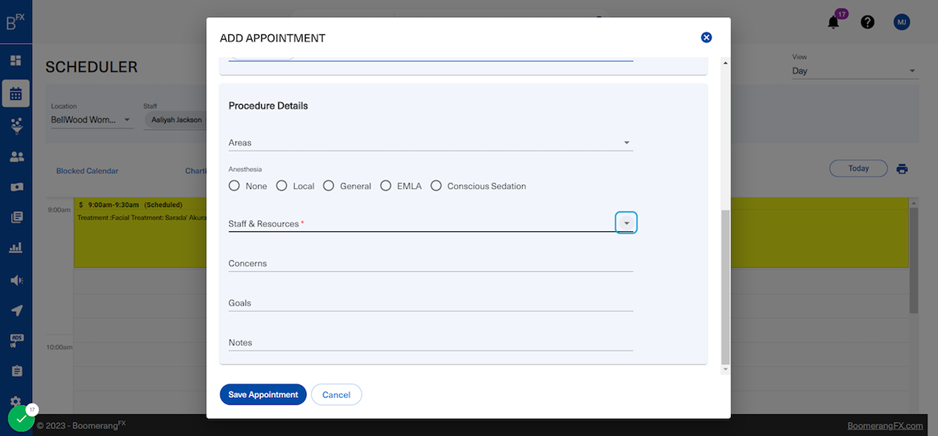
16. In this example, Aaliyah Jackson will be chosen as a staff member
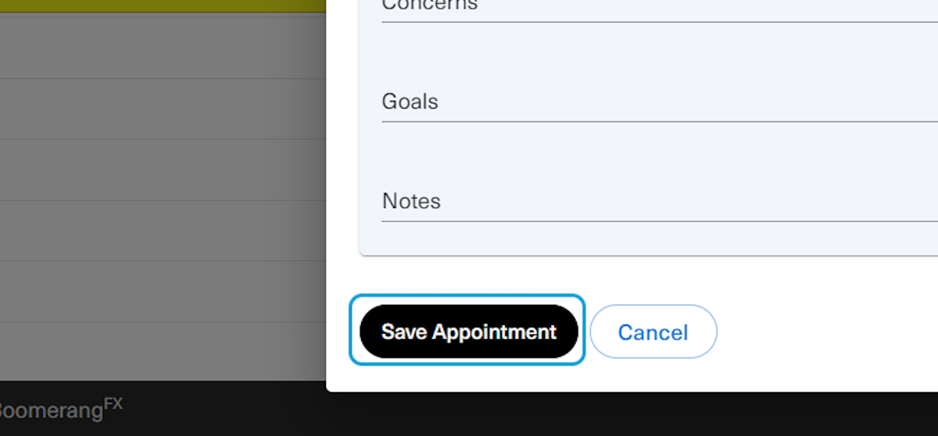
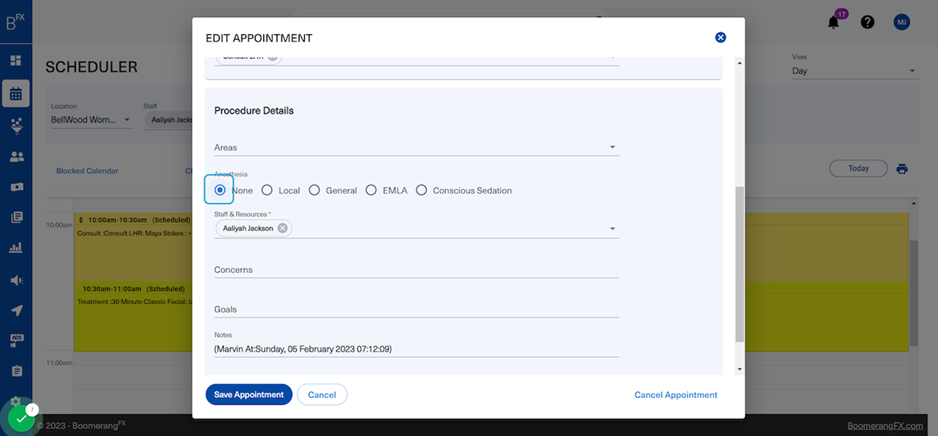
 17. For the appointment to appear in the scheduler under the chosen staff member, the user will click on Save Appointment
 18. A green drop down will appear indicating that the appointment has been successfully created and added to the schedule
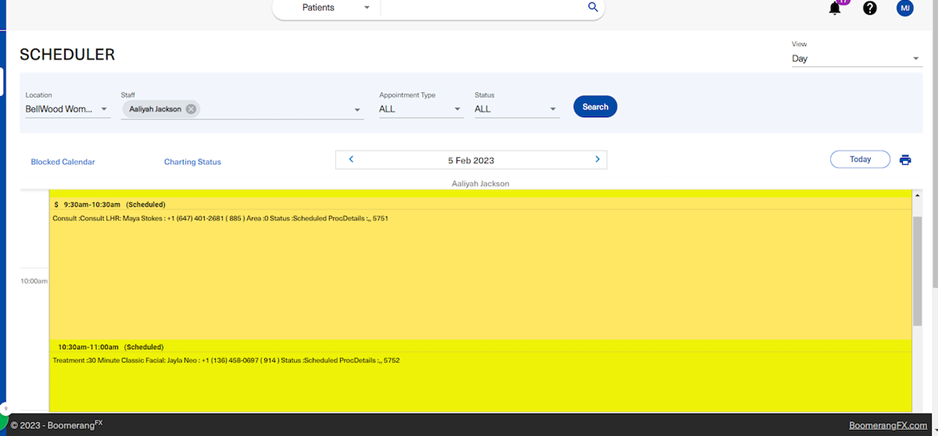
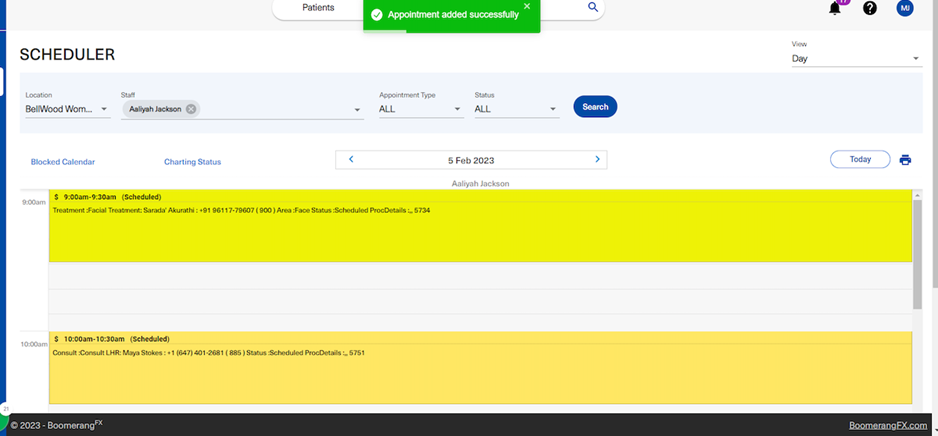 19. By hovering over the appointment shown in the scheduler, the user is able to view more specific details about the appointment
 20. Another appointment will be booked to showcase the New Patient option. Double-click on the empty space in the scheduler
The blue circle in the image below represents the double-click.

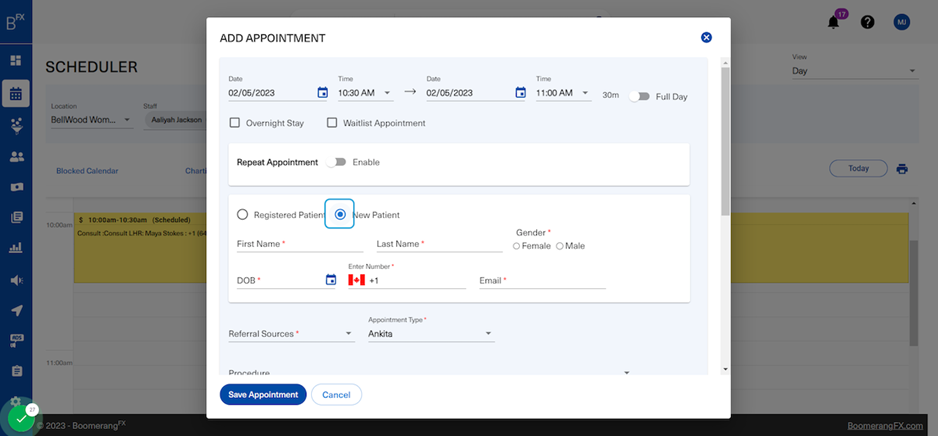
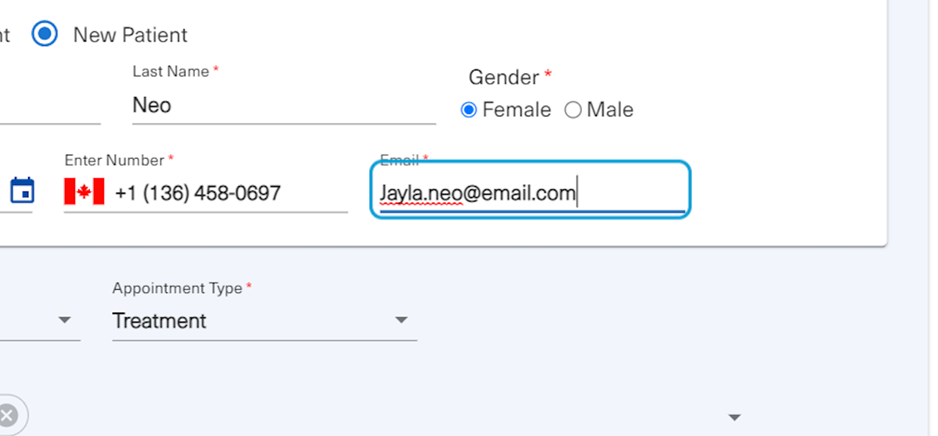
21. Click on New Patient
As you may notice, the fields changed in this option as compared to when the "Registered Patient" was chosen. The user is capable of creating a new patient directly, without having to leave the scheduler.
22. All the fields are mandatory. The user will fill them all out in order to create the new patient and proceed with booking the appointment
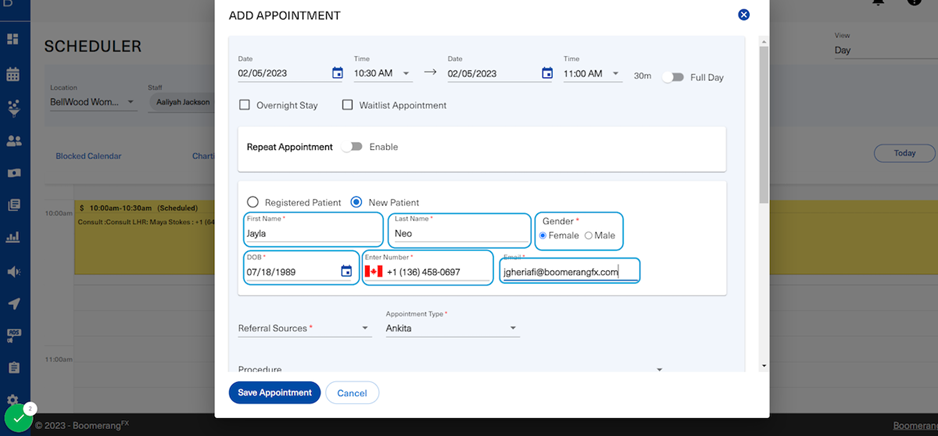
23. The user will also fill out the remaining required fields as necessary
24. Click on option
25. Click on Open
26. Click on option

27. As mentioned earlier, the list of procedures differs according to the appointment type chosen
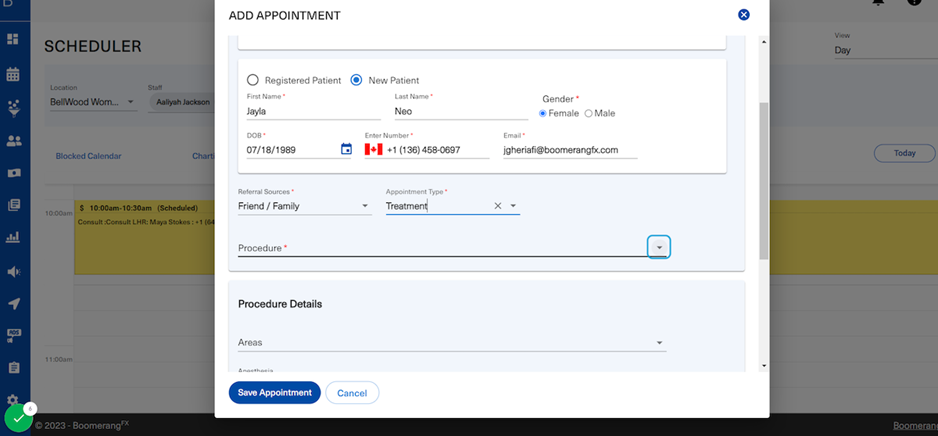
28. In this example the procedure list is different because the appointment type is a Treatment, not a Consult

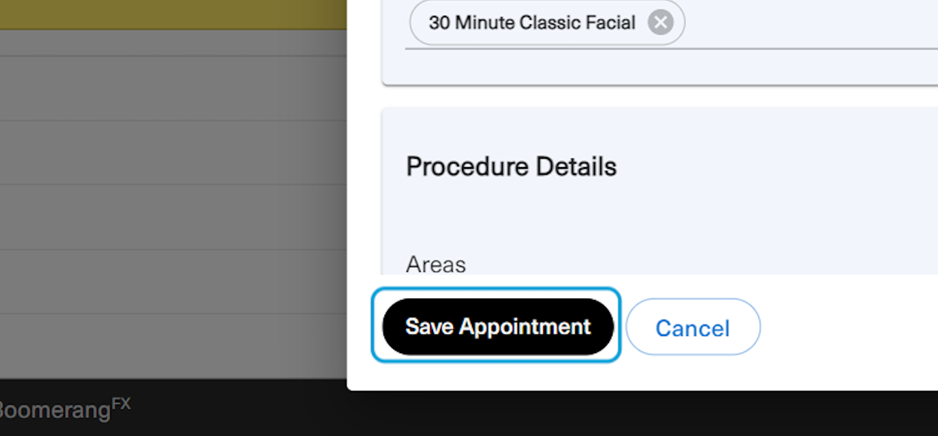
29. After all required fields are filled as necessary, the user will click on Save Appointment
 30. In this example, the system was able to detect a potential duplicate!
The email address entered for the new patient matches an email address created for an existing patient. The system allows the user to save regardless, or cancel and review the current appointment with the new patient details.

31. Email address will be changed for the purpose of this workflow
32. Finally, after reviewing, the user will click on Save Appointment
33. The appointment will automatically appear in the scheduler and the confirmation message will appear at the top
This patient is now in your patient list. To view the patient, you may peak over to step 51

34. Editing Appointments
To edit an appointment, the user will double click on the appointment block in the scheduler.

35. In this example, the start time is being edited

36. Another edit is also done
37. To save all edits, the user will click on Save Appointment

38. The scheduler will reflect the changes done
In this case, the procedure time was extended. This was reflected in the size of the appointment block on the scheduler.
39. Cancelling an appointment
The user will double click on the appointment block on the scheduler in order to edit it
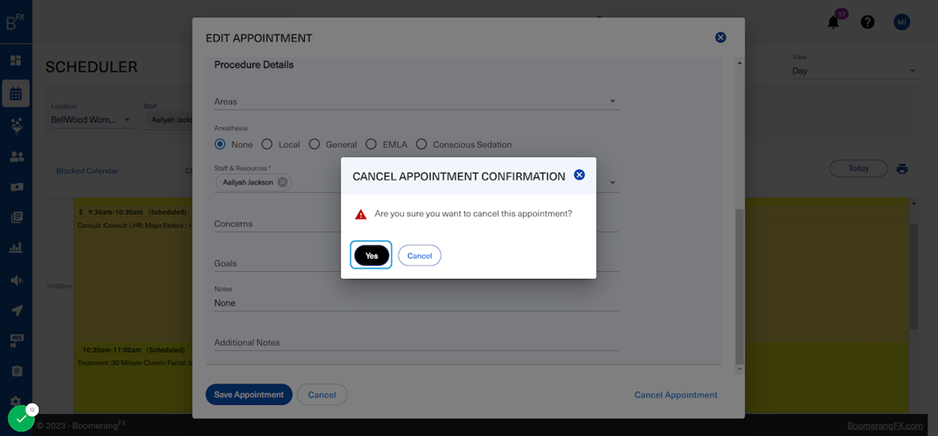
40. The user will click on the Cancel Appointment button

41. A confirmation pop-up will appear
The user may choose Yes to confirm the cancellation, or Cancel (or the X button) to go back
42. Once the appointment is confirmed, the green confirmation message will appear

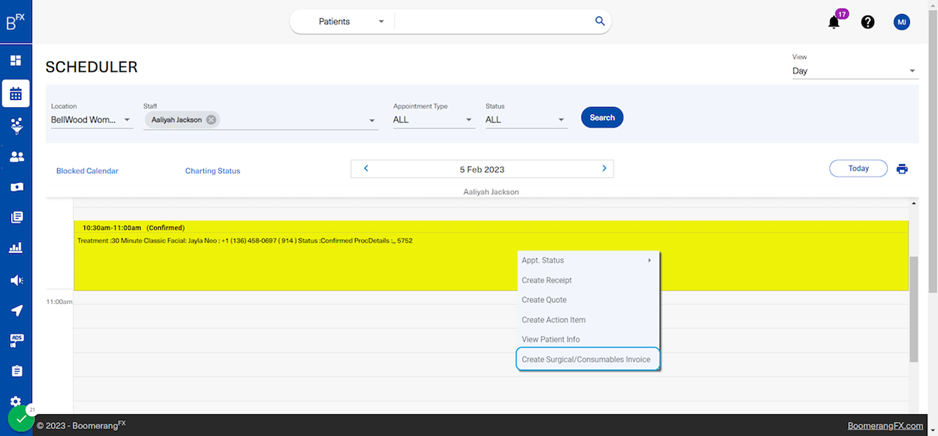
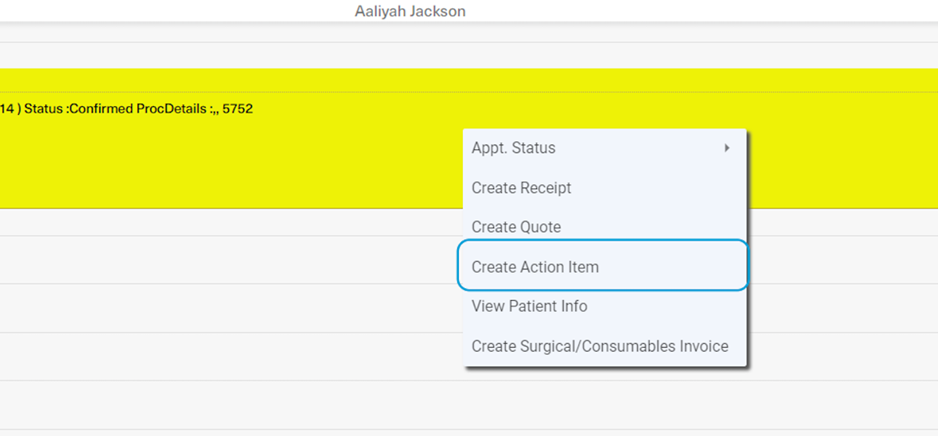
43. Right Click Options
As mentioned earlier, by hovering over the appointment block in the scheduler, the "more details" pop-up will appear. However, once the user right clicks on the appointment, the pop-up will disappear and instead the list of Right-click Options will show

44. The Appointment Status option allows the user to manually update the patient journey at the practice

45. By clicking on confirmed...

46. The green confirmation message will appear and the status on the appointment will display: "Confirmed"

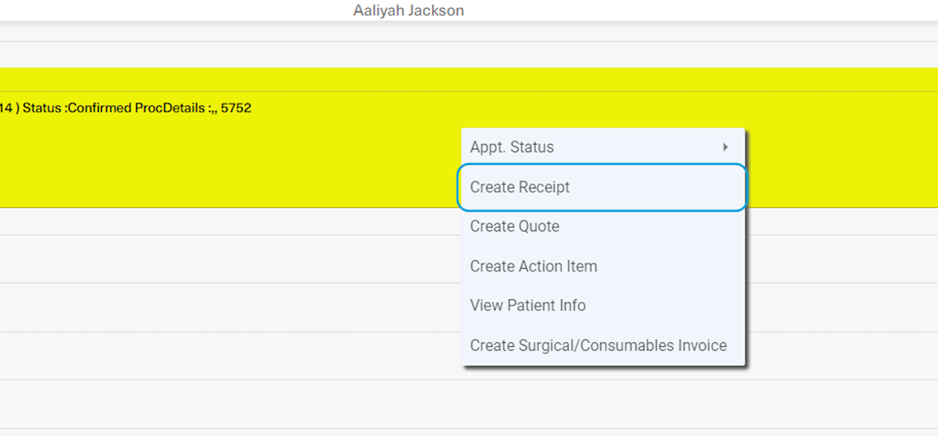
47. Create a receipt
This is a shortcut that allows the user to create a receipt for the patient associated with this appointment with one click
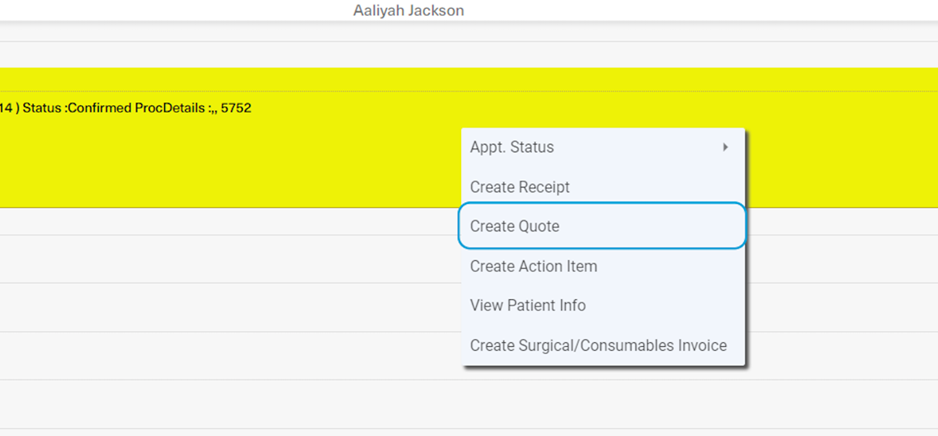
48. Create Quote
Single-click shortcut to create a quote for the patient associated with the appointment
49. Create Action Item
Single-click shortcut to create an Action Item for the patient associated with the appointment
50. After right clicking on the appointment, the user may view the Patient Profile
Upon creating an appointment of a new patient, the user may wish to complete filling out the rest of the information related to the patient who was just added to the patient list. This shortcut allows users to navigate to the patient profile in one click.
Users may also benefit from this feature by following up on a patient's consent forms or reviewing any necessary information and contacting the patient as needed before an upcoming appointment.

51. This is the patient's profile

52. Create Surgical/Consumable Invoice
Single-click shortcut to create an invoice for the patient associated with the appointment